Kitchen cabinet paint needs to survive grease, steam, and daily slamming, so it has to be tougher than regular wall paint. The right choice is a hard-curing enamel in satin or semi-gloss, applied over a bonding primer after the surface is cleaned and lightly sanded.
Why regular wall paint doesn’t work on cabinets
Wall paint is built to look good and hide roller marks on a flat, low-touch surface. Cabinets get opened and closed dozens of times a day, and they take direct hits from pans, hands, and toddlers three feet tall. A flat or eggshell wall paint will scuff and peel within weeks under that kind of use
Cabinet paint is formulated differently. It’s designed to cure into a hard, closed film rather than staying slightly soft the way wall paint does. That hardness is what lets it survive a wet sponge, a stuck-on food scrape, or a swinging door hitting the frame.
The paint types worth using
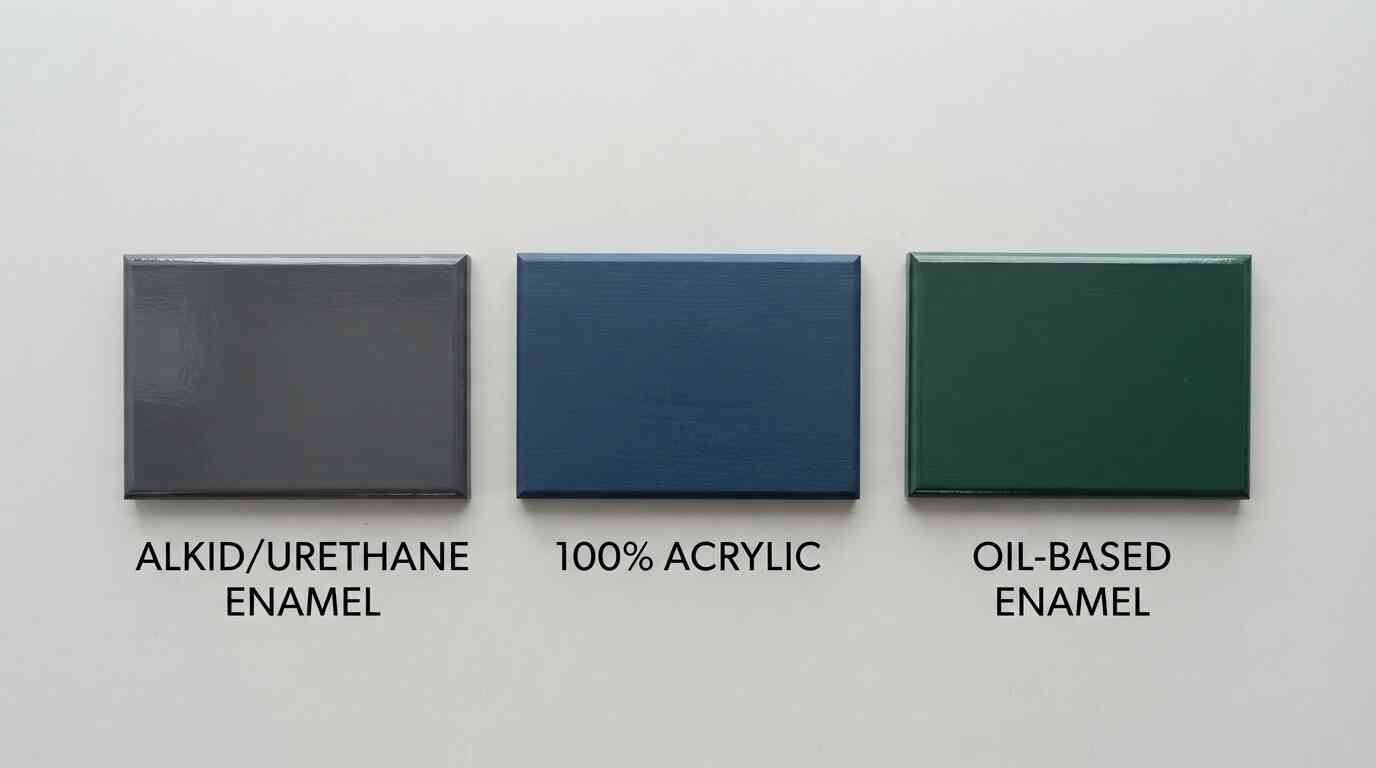
Alkyd and urethane enamels
These are the paints most cabinet painters reach for first. They’re water-cleanup, so there’s no mineral spirits involved, but they cure to a finish that behaves much like old-school oil paint: hard, smooth, and self-leveling enough to hide brush marks. Two products come up again and again in cabinet painting circles: Benjamin Moore Advance and Sherwin-Williams Emerald Urethane Trim Enamel. Both need real cure time (professionals typically recommend letting the final coat sit for two to three weeks before heavy use), even though they feel dry to the touch after a day.
100 percent acrylic paint
A high-quality acrylic in satin or semi-gloss is a solid budget-friendly option. It dries faster than alkyd enamel and cleans up with water, but it’s generally less scratch-resistant, so it rewards a good topcoat or extra cure time.
Oil-based enamel
Oil-based paint still forms one of the hardest, smoothest films available and levels out brush strokes well. The tradeoffs are strong fumes during application, a slower cure, and cleanup that requires mineral spirits, which is why many painters have shifted to the newer alkyd formulas instead.
Picking a sheen
Satin and semi-gloss are the two finishes that show up on almost every cabinet job, and for good reason: both wipe clean easily and hold up to scrubbing. Semi-gloss reflects more light and highlights every surface imperfection, so it rewards careful sanding beforehand. Satin hides minor flaws better while still cleaning up easily, which is why a lot of painters default to it on cabinets that weren’t perfectly smooth to start.
Prepping cabinets before you open the paint can
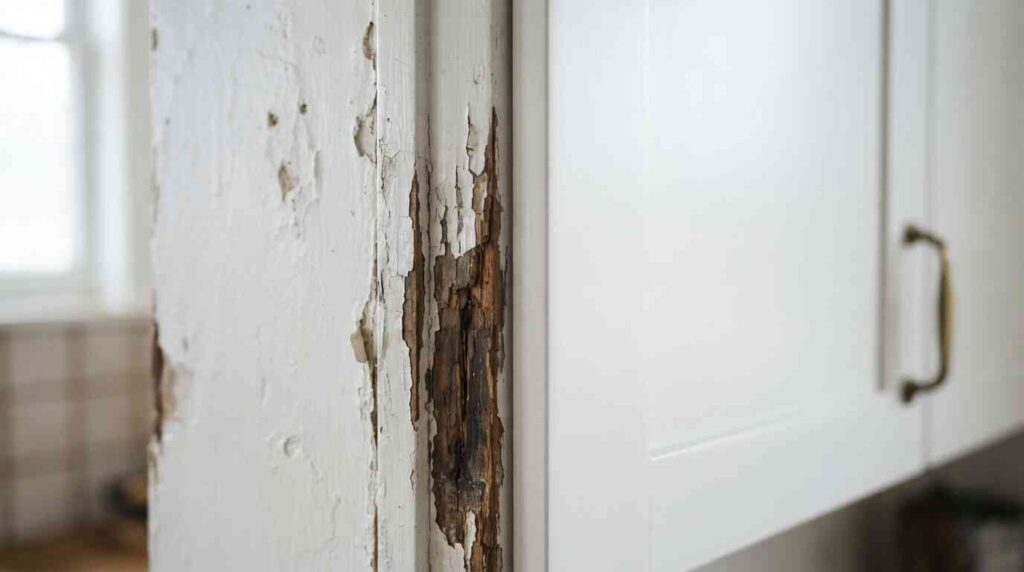
Skipping prep is the single biggest reason a cabinet paint job fails early. Grease sitting on the surface stops paint from bonding, and a glossy factory finish gives new paint nothing to grip.
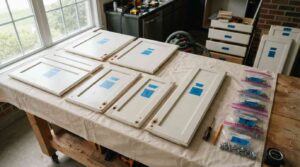
Start by removing the doors, drawers, and all hardware, including hinges, and labeling each piece so it goes back where it came from. Wash every surface with a degreaser or a strong detergent solution to strip off cooking grease, since a damp cloth alone won’t cut it in a kitchen that’s actually used. Once everything is dry, sand with something in the 120 to 150 grit range to knock down the shine and give the primer a surface to hold onto, then wipe away the dust with a tack cloth. Fill any dents, holes, or gaps with a ready-mixed wood filler, then sand that patch smooth once it’s dry.
Priming, painting, and curing
A bonding primer is worth the extra step, especially over laminate, melamine, or a previously glossy factory finish, because it’s built specifically to grip surfaces that regular primer slides off. Skip this step on a dark-to-light color change and the old color has a real chance of bleeding through the new one.
Apply the primer with a brush for edges and corners and a foam or microfiber roller for the flat door fronts, then let it dry fully, usually about an hour in a well-ventilated room, before sanding lightly with fine, 220-grit paper. Two thin topcoats beat one thick one: a heavy coat is far more likely to sag or leave drips in the corners. Sand lightly between coats with the same fine paper, and let each coat dry completely before adding the next.
The finish will feel dry within a day, but it isn’t fully cured. Curing is the slower chemical hardening that gives the paint its actual scratch resistance, and it can take two to three weeks depending on the product. Reinstall hardware once the paint is dry to the touch, but treat the cabinets gently, avoiding heavy scrubbing or stacking anything against a freshly painted door, until that full cure window has passed.
Common mistakes that ruin the finish
Rushing the dry time between coats is the most frequent complaint painters run into, since paint applied over a tacky coat drags and lifts instead of laying flat. Painting over grease without degreasing first is a close second, and it shows up months later as peeling near the handles where hands touch most. Using a flat wall paint instead of a cabinet-rated enamel is another repeat offender, because no amount of careful technique can make a soft-curing paint act like a hard one.
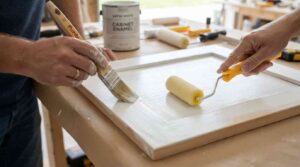
Getting a professional-looking result without a sprayer
A paint sprayer produces the smoothest possible finish, but it comes with a real learning curve, plus the need to mask off the entire kitchen and often rent equipment. A high-density foam roller paired with a quality angled brush can get remarkably close, especially with a self-leveling enamel that smooths out roller texture as it dries. Working with the doors laid flat on sawhorses, rather than standing upright, also helps prevent drips and gives a more even coat.
Kitchen cabinet paint is one of the few home upgrades where the product choice matters almost as much as the technique. Pick a cabinet-rated enamel, respect the prep work, and give the paint its full cure time, and the finish will hold up the way a factory cabinet does.
FAQ’s
1:What is the best paint for kitchen cabinets?
A hard-curing alkyd or urethane enamel in satin or semi-gloss, such as Benjamin Moore Advance or Sherwin-Williams Emerald Urethane Trim Enamel, is what most professional cabinet painters reach for. These paints cure to a harder, more scratch-resistant film than standard wall paint or basic acrylics.
2:Do I need to prime kitchen cabinets before painting?
A: Yes, in almost every case. A bonding primer helps new paint grip laminate, melamine, or a glossy factory finish, and it’s especially important if you’re going from a dark cabinet color to a lighter one, since it blocks the old color from bleeding through.
3:How long does kitchen cabinet paint need to cure?
A: The surface usually feels dry within a day, but full cure, meaning the paint has hardened enough to resist scratches and heavy use, typically takes two to three weeks depending on the product. Treat the cabinets gently during that window even though they look finished.
4:Can I paint kitchen cabinets without sanding?
A: Some bonding primers are formulated to reduce or skip sanding on clean, dull surfaces, but a light scuff sand still improves adhesion on most factory finishes. If your cabinets are glossy or previously lacquered, sanding is worth the extra time.
5:Is satin or semi-gloss better for kitchen cabinets?
A: Both hold up well to cleaning. Semi-gloss reflects more light and shows surface imperfections more readily, while satin hides minor flaws while still wiping clean easily, which is why many painters default to satin unless the cabinets were sanded to a very smooth finish.